There’s something so fulfilling about doing something yourself, and having more control over the process and the final product. Whether its DIY gummies, baked goods, or tea, home jobs are sometimes way better than buying any product. So, if you’re into tinctures, here are some guidelines for DIY weed tinctures, that should have you making a great product, all on your own.
Having quality products to buy is a great thing. But sometimes it’s best to get a job done yourself. With these DIY guidelines for making weed tinctures, you can control for all factors and create the best product possible, all on your own! Welcome to our little publication, where we go over everything relevant in the wide world of weed. Keep up by subscribing to THC Weekly Newsletter, and also get direct access to offers on vapes, edibles, and other paraphernalia, as well as deals for cannabinoid compounds like HHC-O, Delta 8, Delta 9 THC, Delta-10 THC, THCO, THCV, THCP & HHC. Check them out in our “Best-of” lists. Please keep in mind.. *cannabinoid products are not for everyone, and we advise that people only use the products they are comfortable with using.
What’s a tincture?
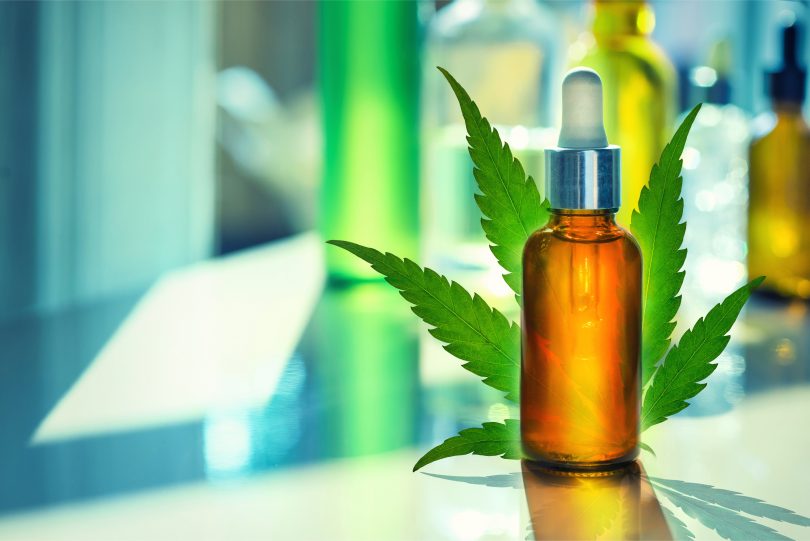
A tincture is a form of extract, and can be used for most any kind of plant where the idea is to extract plant compounds. In the case of cannabis, a tincture is meant to leach out all the cannabinoids and terpenes, while leaving the rest of the plant matter behind. Tinctures can often take some time to make, and generally involve leaving a mix of plant materials and solvent over a period of time, while shaking it frequently to remove the constituents from the plant matter.
Tinctures involve the use of a solvent, but this can vary depending on what a person wants to use. Ethyl alcohol is the most popular solvent used, but glycerin is also frequently used, and vinegar can be used as well. The second two options are employed more by those who don’t want to use alcohol for whatever reason, but even if alcohol is used, it can technically be burned off at the end.
If we really want to get down to it, even water can be thought of as a solvent, but the end result when using water is much weaker than when using one of the above-mentioned solvents. Some people go as far as to only call alcohol extractions tinctures, while leaving the rest under the heading of ‘extract’ only.
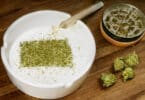
When a tincture is done, it leaves a very strong mixture that is then taken by the drop. They are pretty simple to make, and do not require dangerous chemicals or processes. In fact, all you need is a little patience. For a tincture extraction, you need plant material, a solvent like alcohol or glycerin, an airtight jar like a mason jar, cheesecloth for straining, dropper bottles for storage of the final product, and a dark place to store it while its doing its thing. Different variations call for other factors like cold or heat.

Tinctures come with the benefit of not needing to smoke anything, and are quickly absorbed, especially when using alcohol. They can be taken sublingually, which means put under the tongue, which allows for quick absorption as well through the blood vessels in the mouth. This is especially true when using alcohol, which already permeates cell walls better than other liquids. This gives them two ways of getting to you, directly to your bloodstream, and through your digestive tract when swallowed. If the latter is not desired, the tincture can be spit out after sublingual administration to allow for less getting absorbed through the digestive tract.
DIY weed tinctures step one: the menstruum
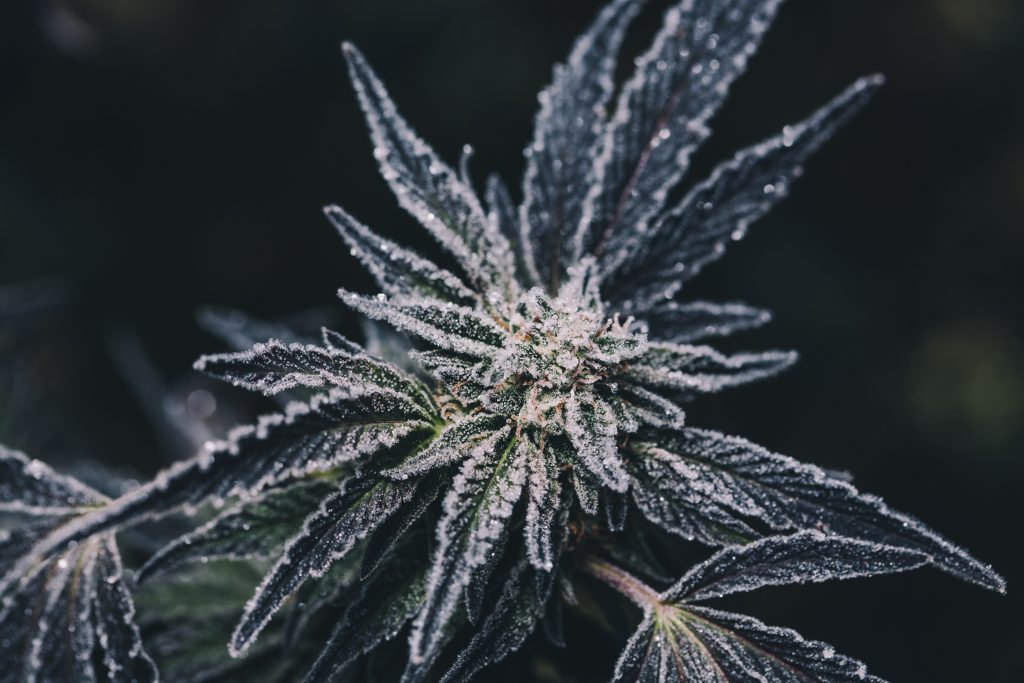
As stated, you can use alcohol, glycerin, or vinegar for a tincture, and the three come with their own stipulations and benefits. Ethyl alcohol is the best to use for a menstruum as it will extract the most compounds. Whereas for many herbal tinctures, a standard 40-50% bottle is enough, in the case of cannabis, a very strong proof alcohol is necessary, closer to 100%. This is also true for roots and barks, whereas flowers can generally be tinctured with a lower alcohol percentage. This is not the case for cannabis flowers since resins require a stronger proof to break down.
Glycerin and vinegar make good options for people who, for whatever reason, do not want to use alcohol. Though sometimes these aren’t considered tinctures, I’m including them in the general explanation. When using glycerin, buy a 100% vegetable glycerin. The anti-fermentative properties allow these tinctures a long shelf-life, though not as long as alcohol.
When it comes to vinegar, apple cider vinegar is best, especially raw. However, any type of vinegar can be used so long as the acidity is 5%. This could require diluting a stronger vinegar, or using it directly if it starts with the right acidity. Regardless of what is used, the term ‘menstruum’ refers to the solvent meant to break down the plant material. And the instructions are generally geared to the use of alcohol.
DIY weed tinctures step two: to decarboxylate or not
Your first major decision after what menstruum to use, is whether you want your tincture to make you high, or if its purely for medical purposes. A tincture can work both ways, and the final product depends on whether you decarboxylate your plant material first. Decarboxylation is a chemical process by which the application of heat makes the THCA that is native to the plant, drop a carboxyl group (COOH), to become the THC (delta-9) that gets us high. The transformation is C22H30O4 to C₂₁H₃₀O₂.
Delta-9 THC only exists in small amounts in a fresh plant, and the THCA that does exist in larger quantities, breaks down to delta-9 over time naturally through time and light exposure. Heating it simply quickens the process, more immediately transforming the THCA to THC in order to create a psychoactive response. Therefore, if this is meant only for medical purposes, the cannabis doesn’t need to be decarboxylated. However, if you want to get high from it, you’ll need to do this process first.
Decarboxylation is best done in an oven that maintains a stable temperature. Toaster ovens can work, but the temperature must be monitored more closely since the temperature fluctuates and this can cause problems if it gets too high. An oven thermometer is good to have, and it can take some close monitoring to ensure the temperature stays within bounds.
Some people do a longer decarb on a lower temperature, some people do a shorter one at a higher temperature. Generally its done between 200-300º F (93.3-149º C). At lower temps, it can be left in for about 45 minutes, at the higher temps, for only about 15-20. If going as high as 325º F (162º C) it can be for as short as five minutes, but such high temperatures often burn out desired compounds.

The weed is broken up to a consistency just chunkier than powder and laid on a baking sheet evenly. This is then put in the center of the oven, with the thermometer right by it to ensure that you’re measuring the temperature in the right part of the oven. Some people like to cover the whole thing with tin foil to keep vaporized particles from escaping, allowing them to condense back onto the cannabis material. How useful this is, is hard to say.
DIY weed tinctures step three: the method – folk
The standard – or folk – method for creating a tincture mainly involves patience and time. For a weed tincture, you’ll need approximately one gram of flower per one fluid ounce of menstruum. Cover all the plant material with the alcohol, and put the mixture in a glass jar with an airtight lid. The cannabis should be cut up, or ground down, and should not be so compact that it can’t move in the menstruum.
Glass is important because plastics break down with alcohol and other solvents. This means the jar should be glass, and the lid a non-corrosive metal. You can place parchment paper under the lid to keep corrosion from happening. Airtight is also important, as contact with oxygen oxidizes the material, rendering it useless. The mixture then sits for about 6-8 weeks, and should be shaken frequently.
Shaking is important because it allows the plant constituents that the alcohol is loosening from the plant, to move away from the plant, and into the menstruum material. Agitation is always a part of an extraction process, and shaking the bottle serves to agitate the tincture and remove the particles from the plant.
When the waiting period is over, the mixture is run once or twice through cheesecloth to get out unnecessary plant materials. Then its bottled in an airtight bottle (dropper bottle in a good idea), and stored for as long as it will last. Alcohol tinctures have a very long shelf-life and can be kept for years.
DIY weed tinctures step three: the method – freezer
If you’re looking for a faster process, the application of freezing temperatures is actually beneficial. This might sound odd since we usually talk about heat quickening a process, but in this case, it’s actually the cold that’s useful. Why? When the water in the plant material freezes, it does what water does, and expands. This allows it to burst through the trichome walls, which are already more brittle from the cold.
First, both the alcohol and weed are put in the freezer, but separately, allowing them both to get very cold. They are left to freeze separately for several hours. Then the two are added together, and shaken vigorously. The mixture should be shaken several times a day for 2-3 days, and replaced in the freezer in between. After three days, the mixture is strained, and stored as usual.
I have used this method several times, and did find that it was a much quicker way of accomplishing the same thing. It requires a little more work in the beginning, but nets a much quicker outcome. I cannot say if this is better than heat in the end, but both hot and cold do provide an expedited way of tincture-making.
DIY weed tinctures step three: the method – heat
The hot method, sometimes called the Green Dragon method, has to do with using heat to speed up the process, as heat makes thing break apart. It also requires a bit more equipment than the other methods, and slightly more danger. This time around, when you put your cannabis in the jar with the alcohol, the jar is put in a saucepan with about an inch of water around it (waterbath). The water is brought to a boil, and the jar is left uncovered.
Once the waterbath water reaches boiling temperatures, the temperature is lowered down to a simmer until the contents of the jar reach about 165º F (74º C). You can use a thermometer to measure this. It shouldn’t get hot enough for the alcohol to boil, but if it does, turn down the heat so as not to burn the alcohol off. As a tip, if a person creates an alcohol tincture, and doesn’t want alcohol at the end, they can also use this method to boil the alcohol out.
Make sure the room is well ventilated as alcohol fumes are not great to breathe in. Also best to use an electric burner as alcohol is highly flammable. When the mixture reaches 165º F, take the jar off the stove and let it cool down. Once cooled enough, it can be strained like usual, and voila, you’re done the whole process in much less time!
Conclusion
Tinctures allow for quick absorption, and the benefit of not smoking. With DIY weed tincture methods, you can control the ingredients used, the process undertaken, and the quality of the final product. Happy tincture-making!
Hello readers! Thanks for joining us at CBDtesters.co, your premiere internet spot for well-rounded and independent coverage of cannabis and psychedelics-related news. Read-thru the site when possible to stay aware of the always-moving universe of cannabis and psychedelics, and subscribe to The THC Weekly Newsletter, for your daily dose of industry news.